
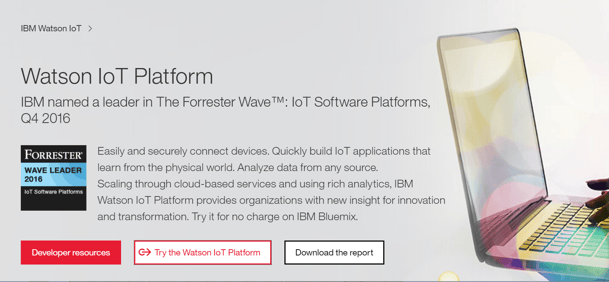
 If you've heard about our Opto 22 SNAP PACs with their built-in RESTful API (application program interface), you may be wondering how you'd use that API to send real-world data to the IBM Watson IoT platform.
I'll show you how, step-by-step, in this blog post. It's a long post, but it includes everything you'll want to know. (You can print this page as a PDF if you like.)
What you’ll need:
- An org account with IBM Bluemix. Follow the steps on the screen to create one.
- An Opto 22 SNAP PAC hardware controller with firmware version R9.5a or higher, with its RESTful server enabled. In this example, we’re communicating with a SNAP-PAC-R1 that’s part of a SNAP-PACLC Learning Center. This Learning Center hardware also includes a temperature probe.
- A Node-RED flow to connect the Opto 22 hardware to an IBM device.
What you'll do (detailed steps below):
1. Configure the Opto 22 PAC Hardware
2. Create a Gateway device in the IBM Watson IoT platform
3. Configure a Node-RED flow to connect the Opto 22 PAC to IBM Watson
4. Deploy Node-RED and check out your data in the IBM cloud!
1. Configure the Opto 22 PAC Hardware
- Assemble and program the SNAP-PAC-R1 as described in the SNAP PAC Learning Center User’s guide, Opto 22 form 1638.
Note: for this example, we renamed the temperature input in the control strategy from Store_Temperature to Lamp_Temperature. We also added an output to turn on a Lamp so we could remotely increase that temperature by turning on the lamp. While this post only describes how to read/monitor the temperature, you can also control an output, such as turning on the lamp, via similar steps.
- Follow SNAP PAC REST API Quick Start steps on developer.opto22.com to configure the controller to use the API.
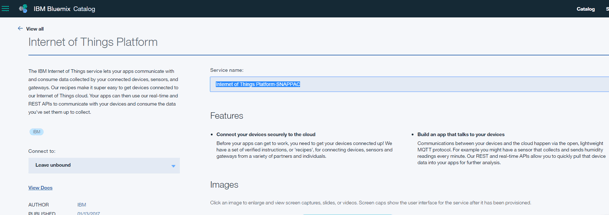
2. Create a Gateway Device in IBM Watson IoT Platform
- Quickstart is the easiest and fastest way to see data in the IBM IoT platform without registering a device or creating a logon account. Simply click this link and copy the device ID that will later be used in the Watson node when creating a Node-RED flow.
- Or to register a Gateway device, log onto IBM Watson IoT Platform.
- Once logged on, click Try the Watson IoT Platform.
- Type a name for your service and click the Create button at the bottom right.
- Click Launch Dashboard to go to your Watson IoT organization space.
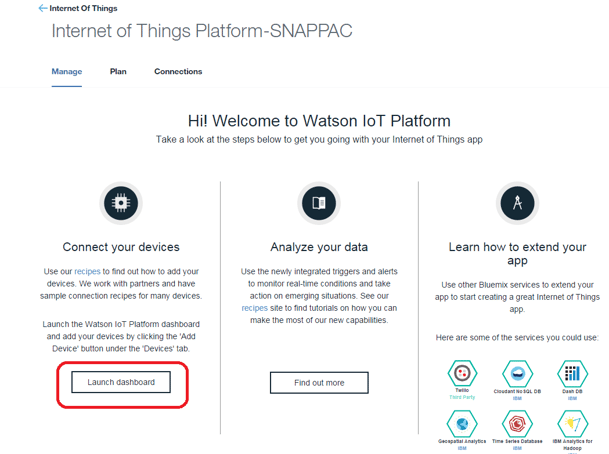
- Click Devices from the list.
- Click Device Types.
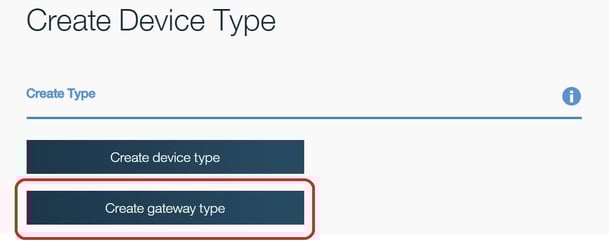
- Click Create Type.
- Click Create Gateway Type.
- Name the Device Type you're adding, and then click Next in the bottom-right corner of the screen.

- A template page appears, where you can select and define one or more attributes. All attributes are optional. They will be used as a template for new Gatewary devices assigned this device type. Attributes you do not define can be edited individually later when you add the Gateway. To define one or more attributes, select them and click Next (see below).

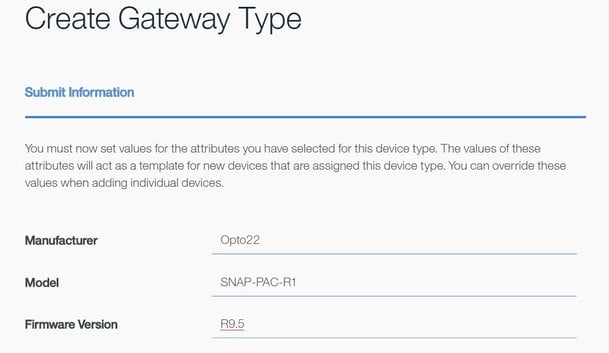
- Define the selected attributes (like Manufacturer and Model), then click Next.
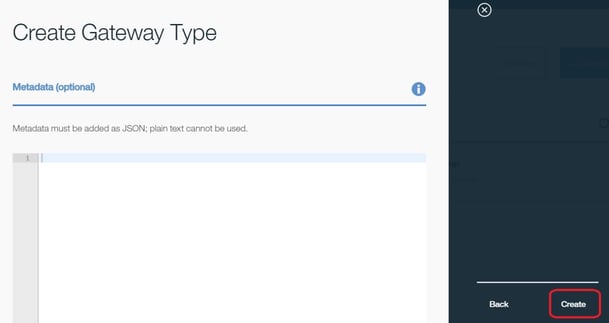
- Define optional Metadata in JSON format, or you can choose not to set this attribute. Click Create.
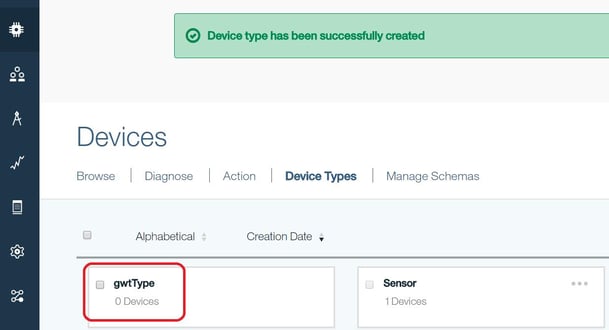
- You have successfully created a device type in Watson IoT. You will see a confirmation screen similar to the one below.
Now we will add the Gateway in the Watson ioT Platform. Gateways are a specialized class of devices in the platform. Gateway devices can register new devices and can send and receive data on behalf of devices connected to them. You need to add the Gateway in Watson IoT before connecting to it. Follow these steps.
- In the Watson IoT Platform dashboard, click the Browse tab and then the Add Device button.

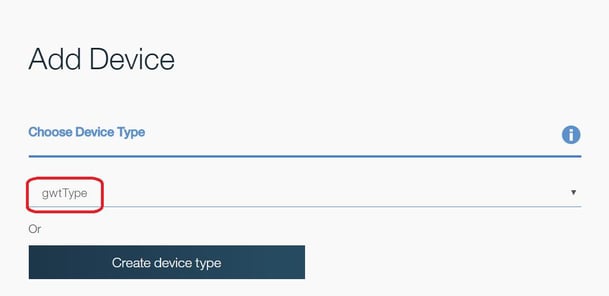
- Choose the device type you created ("gwtType" in this example). Then click Next.
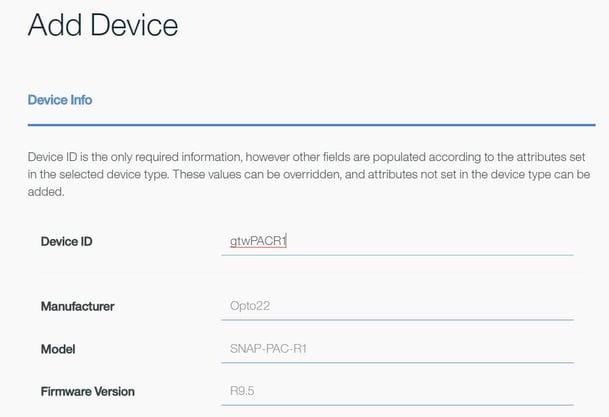
- Enter a unique device ID to distinguish your Gateway from all other devices that you might connect to the Watson IoT Platform. Then click Next.
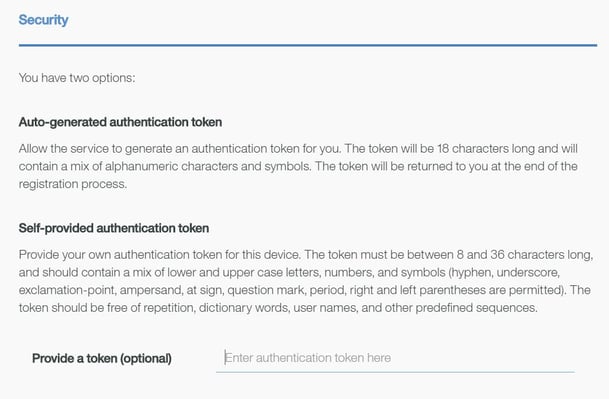
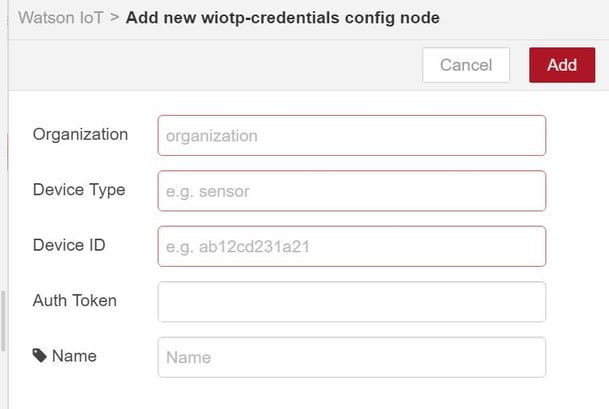
- In the next page, you can either add your own authentication token, or allow the Watson IoT Platform to generate a token for you. Click Next.
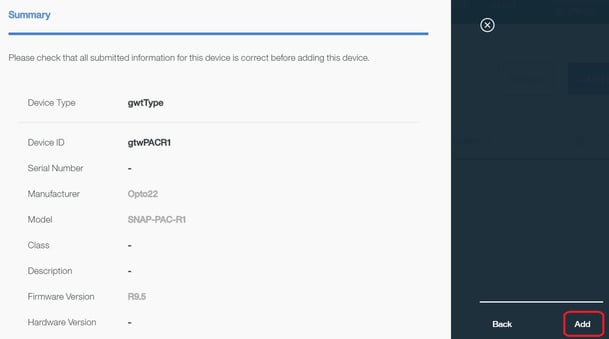
- As shown below, you will see a summary page to verify the details before adding the Gateway to the IoT Platform. Verify and click Add.
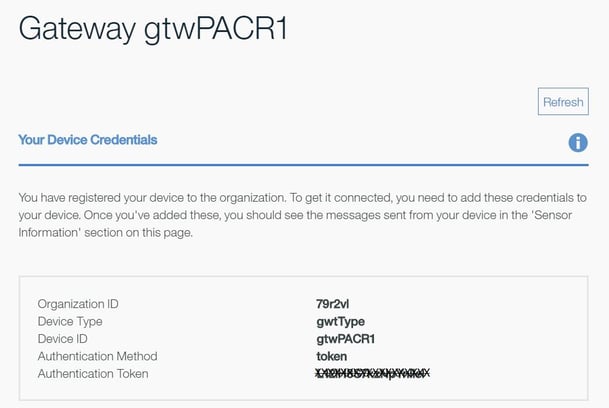
- At this step, the Gateway is registered to your organization, and you are provided with the registration details. To connect to and send data to your Gateway (step 3 below), you will need these credentials, so be sure to make note of them now.
- Click Close to go back to the main dashboard, and observe that the Gateway is added to your organization.

3. Configure a Node-RED flow to connect the Opto 22 SNAP PAC to the Watson IoT node
- Install Node-RED, including the SNAP PAC nodes, as described on this NodeRED for SNAP PAC page. This includes the controller configuration to enable the RESTful server, which the SNAP PAC Node-RED nodes use to read or write to the SNAP PAC controller.
- Install Node-RED Watson IoT node (wiotp) from nodered.org or copy and paste the following on your Node.js command prompt:
npm install node-red-contrib-ibm-watson-iot - Create a flow using the inject, snap pac read, and Watson IoT output nodes.
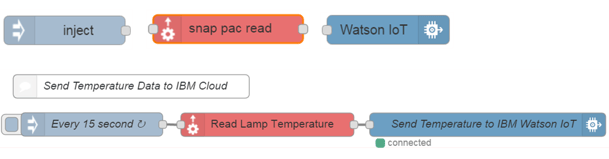
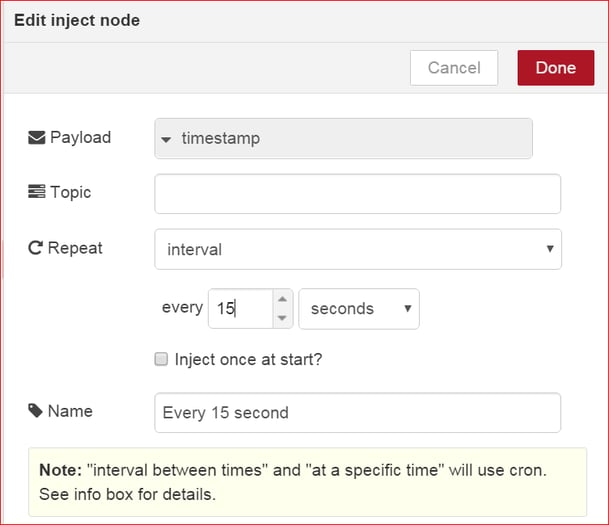
- In the inject node, choose how often to send data. Select an interval or none to send only once.
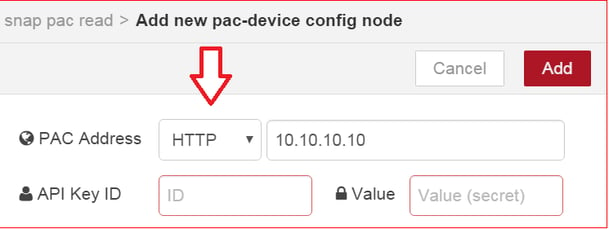
- Add your SNAP PAC controller using its IP address or hostname. Enter the key ID and value pair you selected for your controller when you enabled the RESTful interface.
- Unless you're using an SSL certificate, select HTTP from the dropdown menu.
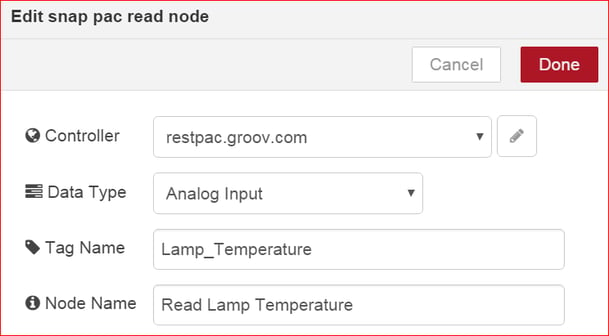
- After the SNAP PAC controller is added, choose the data type and the tag name for the point you want to see in the Watson IoT platform. You'll find the tag name in the PAC Control strategy running on the Learning Center.
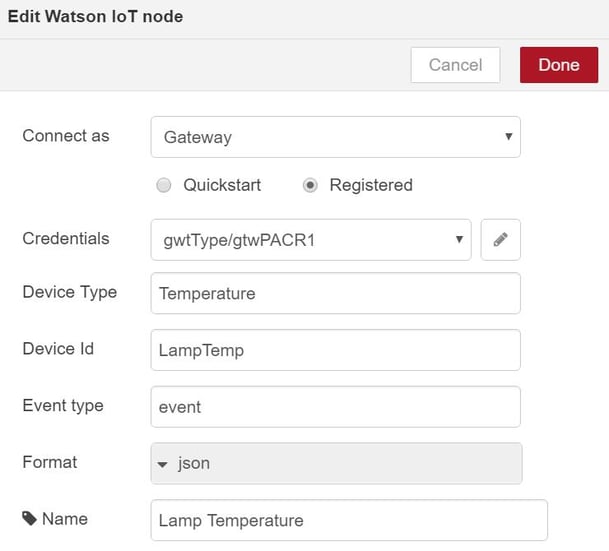
In the Watson IoT node:
- Connect as Gateway, click Credentials, and enter the credentials for your Gateway device.
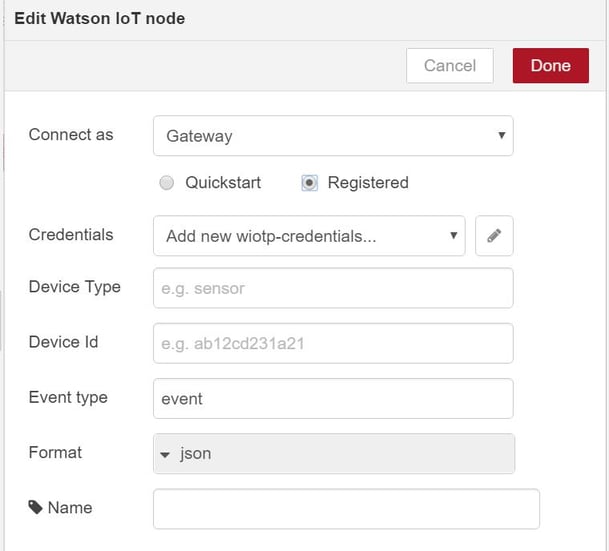
- Now you will use the Watson node to generate the Device Type and ID that will be using the Gateway to send data to the Watson IoT Platform.
4. Deploy Node-RED and check out your data in the IBM cloud!
- Click Deploy.
- Click the inject button.
- Open the Watson IoT platform if it’s not already open.
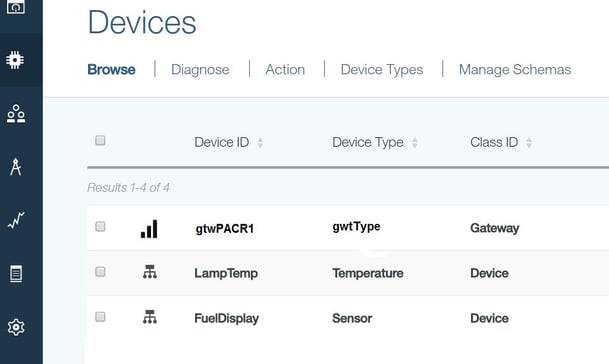
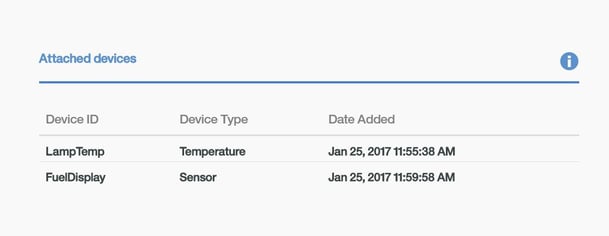
- Click Devices. The Gateway device and attached devices you created appear here.
- Double-click the Gateway, and you will see connection information, recent events, errors, etc., including the attached devices you created in Node-RED.
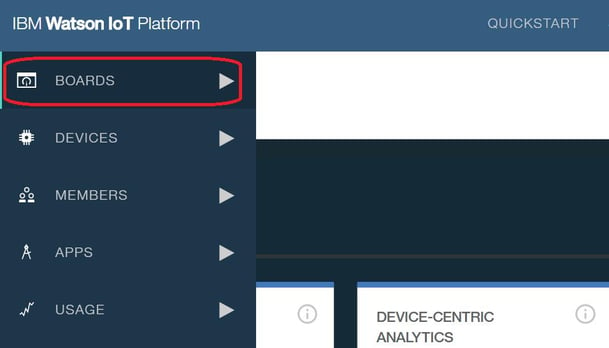
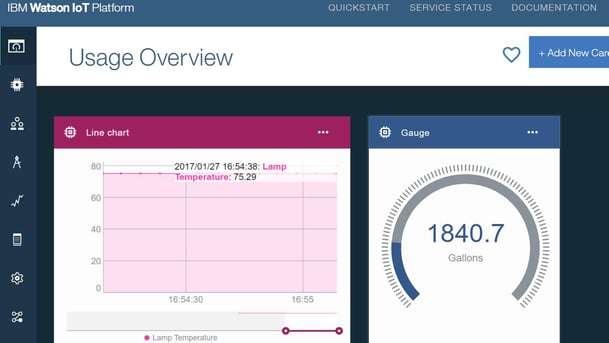
- Create cards in the Watson IoT platform to see your data presented in a user-friendly way. For our temperature, we will use a trend (line graph).
- Click Boards in the top-left corner.
- Create a new board.
- Double-click the new board.
- Click Add new card. Here you choose the option to present the data (gauge, line graph, bar graph, etc.).
- Click the line graph.
- Select your device.
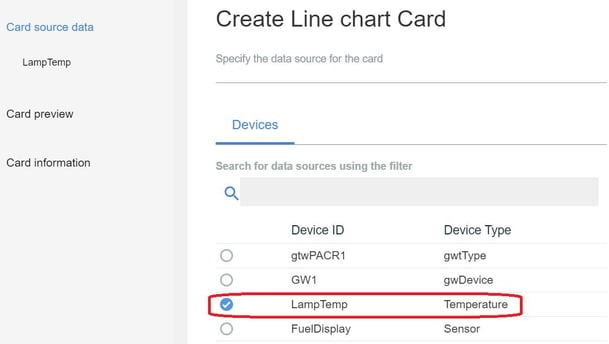
- Click Next.
- Click Connect new dataset.
- Leave Event as event and Property as value.
- Name the point, choose the type and engineering unit, precision, min and max.
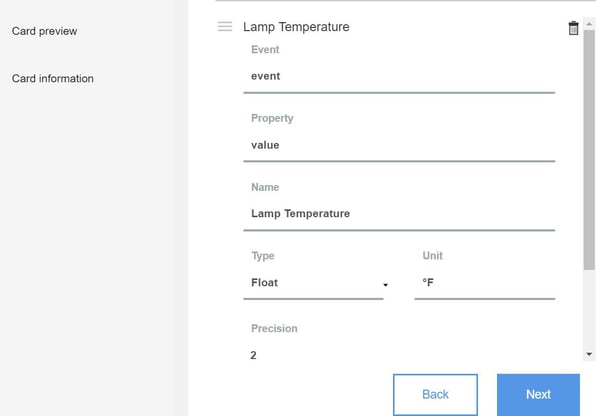
- Click Next. You should see the line graph with the data on it. Under Settings you can make the graph small, medium, or large. On the next screen you have options for color.
- Click Next and give it a title.
- Click submit.
What's next?
You can similarly get data from other input points and signals ("Devices") on the SNAP PAC Learning Center ("Gateway"). Try the Fuel Level as shown above in the gauge.
Also, try using the tools in Watson to trigger an output point on the SNAP PAC Learning Center, based on a condition.
 Further, IBM Bluemix and Watson have a host of tools that allow you to gather data, visualize patterns, advance to analytics, and ultimately make better business decisions.
Bottom Line:
Opto 22’s SNAP PAC System and IBM Bluemix are the perfect combination to deploy in industrial IoT applications for increased business intelligence.
See SNAP PAC controllers—industrially hardened, small-footprint programmable automation controllers that communicate over standard Ethernet networks using TCP/IP, with a built-in HTTP/HTTPS server and a RESTful API.
