
I'm extremely excited about the new capabilities of the 9.5 firmware and, in particular, the new RESTful interface (REST API and HTTP/S server) for SNAP PAC controllers. I have several PACs throughout my home for various tasks like lighting, A/C, irrigation, energy management, monitoring, and surveillance. The new RESTful interface allows me to take my home automation system to completely new levels, including interacting with my other home automation/IoT products, like my Nest thermostats, smoke alarms, and NestCams; my Philips Hue lighting; my Wemo switches; and much more.
This post isn’t about home automation, however. It’s about getting the firmware upgrade done and configuring the HTTP/S RESTful server. And in doing so, it was important to me (and my application) that I preserved the persistent control system variables used in my control strategies. So...the following are the steps I took to upgrade my firmware while preserving important data and getting started with REST.
Disclaimer: This upgrade process is what I did for my application, which is likely significantly different from your application. This is by no means an exhaustive and fully-tested approach. It’s simply my experience with options that made sense for my application (including opting to use unsecure HTTP access for my PACs behind my firewall). Here goes.
What you’ll need:
- IP addresses of your PACs to upgrade
- Your PAC types
- 9.5 Firmware
- PAC Manager (v9.5a or greater)
- PAC Control
- PAC Terminal (optional)
- OptoTagPreserve
- Web browser (I use Google Chrome)
- JSON Viewer Plug-in for Chrome (optional, but worth it)
Steps you’ll take:
- Archive control strategy (PAC Control)
- Upload persistent variables to PC (OptoTagPreserve)
- Install new firmware (PAC Manager)
- Download archived strategy (PAC Control)
- Restore persistent variables (OptoTagPreserve)
- Start strategy (PAC Control)
- Enable RESTful interface (PAC Manager)
- Create HTTP server admin account and key IDs and values (Web browser)
- Test RESTful connection
Now the details. If you need a refresher on any of these steps, download the documentation:
Upgrading to 9.5 Firmware
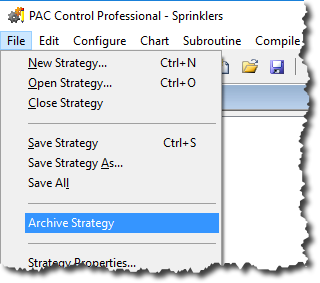
First, I opened up my strategy in PAC Control. Then, I selected File > Archive Strategy from the menu bar. I always back up my strategy before making any changes to my system.
Next, I used our new OptoTagPreserve command-line utility to “upload” or preserve my persistent variables. There are many options available with this utility; I chose only to preserve my persistent variables. To do so, I opened a Command Prompt in the directory where my OptoTagPreserve.exe existed, and then typed the following:
optotagpreserve 192.168.1.200 22001 10000 upload sprinklers -b
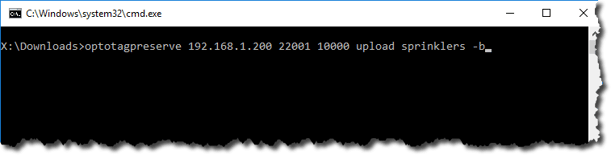
Breakdown: optotagpreserve [ip_address_of_PAC] [port] [timeout] [action] [strategy name] [option -b - persistents only] (See the doc here.)
That resulted in this response from the utility:
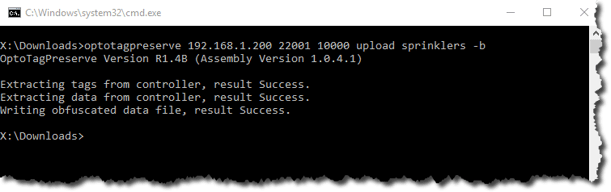
Success! The resulting file, located in the same directory from where I launched the utility, is (we’ll need this later): sprinklers 192.168.1.200 T115043.D08022016.tagarchive
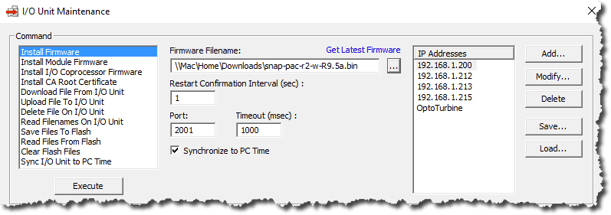
Next, I used PAC Manager to download the new firmware to the controller. My PAC is a SNAP-PAC-R2-W. I confirmed this with PAC Terminal (not a necessary step).
Once the firmware was successfully downloaded, I re-downloaded my strategy to my PAC with PAC Control:
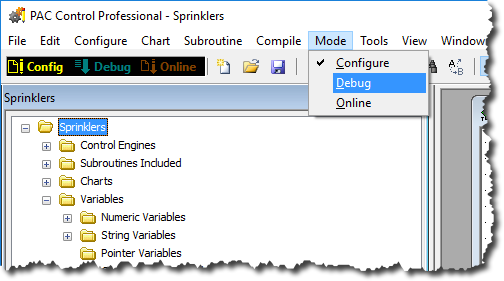
Note: Although PAC Control Professional is depicted above, it's not necessary. All of these steps work with PAC Control Basic, including versions prior to 9.5.
Of course, I received a message that the controller’s memory has been cleared, then a dialog to confirm the strategy file to download.
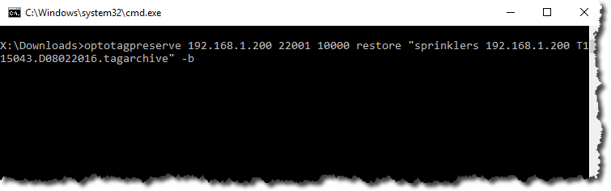
Now at this point, I didn’t start the strategy yet. I first wanted to restore my persistent variables with OptoTagPreserve. So, back to my Command Window, and I typed the following at the prompt:
optotagpreserve 192.168.1.200 22001 10000 restore “sprinklers 192.168.1.200 T163838.D08022016.tagarchive” -b
Note that this command is different from the upload command. This time, I’ll use “restore”. Also note that I need to provide the full name of the tag archive file, and in quotes because there are spaces in the filename.
I was prompted to type YES (no quotes) in all caps to confirm the action to restore.
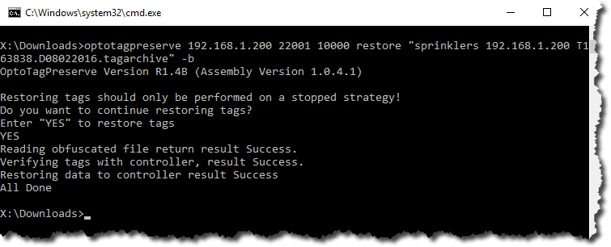
I received Success responses once again, and my preserved persistent variables were restored to my control strategy. Next, I ran my control strategy by clicking "Run Strategy" in PAC Control.
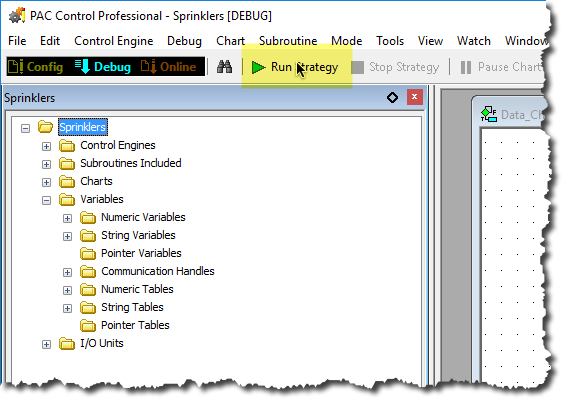
That was it. My 9.5 firmware download was completed, and my strategy is functioning normally. (Again, I confirmed with PAC Terminal.)
Enabling and configuring the RESTful interface
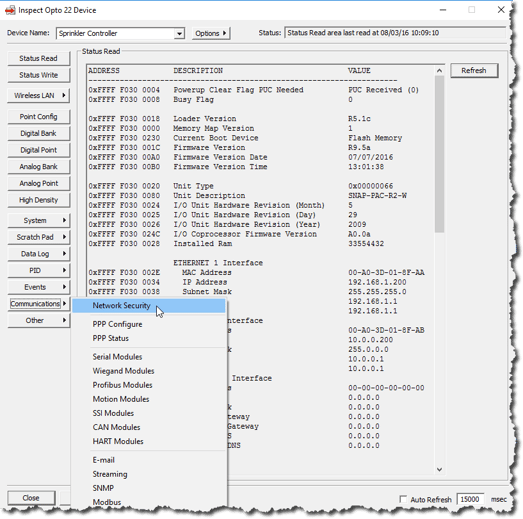
To begin, I started up PAC Manager 9.5 to configure the HTTP/S server and port. In PAC Manager, I first connected to my upgraded PAC. Next, I selected “Communication” and then “Network Security”:
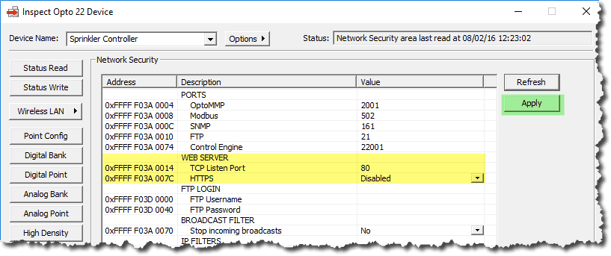
Next, I configured the WEB SERVER. (If you don't see this when you're going through these steps, make sure you're using PAC Manager R9.5a.) For my application, I selected port 80 for the server, and HTTPS disabled. Then, I clicked Apply.
Note: As I mentioned before, I opted not to use secure communications to my REST server, which isn’t recommended even though none of my PACs are exposed to the Internet. Remember, we strongly recommend you always use HTTPS. The steps to configure HTTPS are well documented on http://developer.opto22.com.
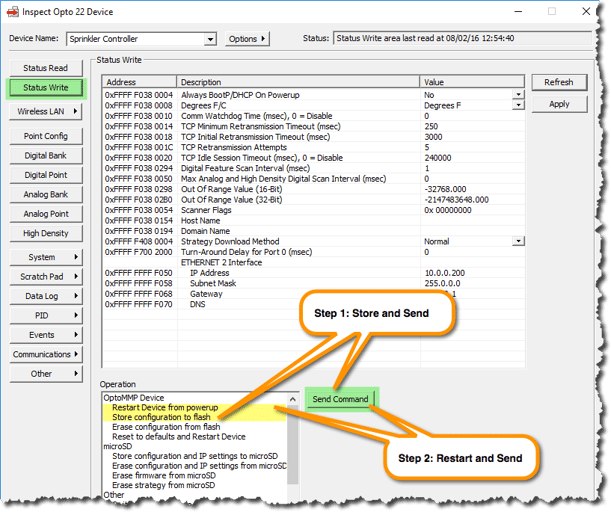
Finally, I needed to save this configuration to flash and restart from Powerup. I did these two steps in PAC Manager on the Status Write page:
Once the server was turned on and listening on port 80, I tested the connection. To do so, I opened up my browser and entered http:// followed by the IP address of my PAC:
http://192.168.1.200
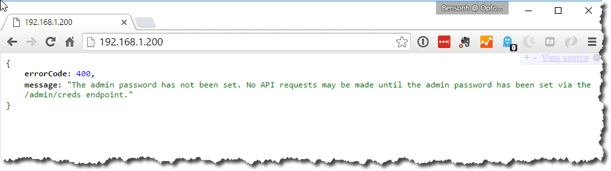
As expected, I received the error code: 400 and a message to configure my credentials. The good news is my HTTP/S RESTful server is working.
So next, I needed to configure the server with my credentials. Even though I wasn’t using HTTPS encryption, I still had to authenticate with a username and password that I needed to create (and had to change from the default). To do so, I pointed my web browser to my PAC at its IP address followed by the resource to change my administration credentials, which is:
http://192.168.1.200/admin/creds
Note: Remember, I’ll be changing my username and password over a non-encrypted connection. I’m convinced that nobody is snooping on my home network and therefore won’t see my base64 encoded credentials flying over the network in plain text. Only proceed if you’re convinced as well. If not, go back and enable port 443 and HTTPS before proceeding.
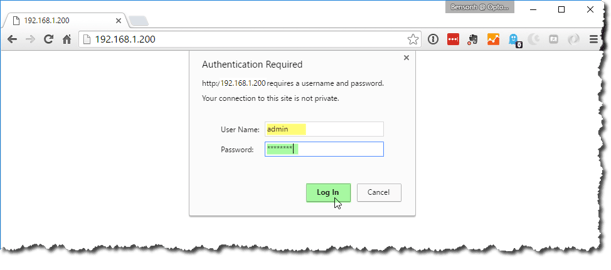
I was prompted to enter the default username and password of admin/password just to get in and update my credentials. Once entered, I got in:
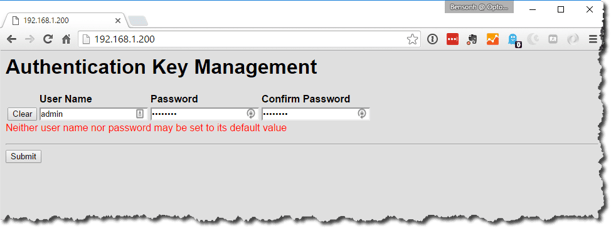
Next, I typed in new credentials: a User Name followed by a Password and a Confirm Password. (Don’t forget your credentials: nobody at Opto can help you if you do. If you do forget, you must restore the PAC to defaults to reset the credentials to defaults.)
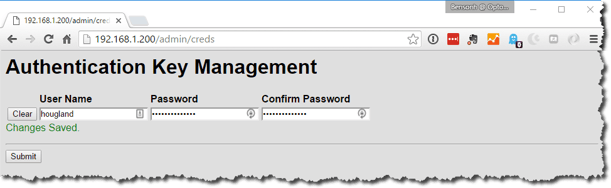
Here’s how things looked once I was done:
I completed my admin credentials, and for the final configuration step, I needed to create key IDs and values for the various applications that will access the PAC’s data via the REST API.
To do that, I navigated to the /admin/keys resource by typing this into my browser’s URL bar:
http://192.168.1.200/admin/keys

As you can see above, I created a Read/Write key ID and value, and a Read Only key ID and value. I set the permissions appropriately and ensured both were enabled. Finally, I clicked Submit.
Last step: Test it!
First, I confirmed my configuration by retrieving the Device Details. Again, I typed the appropriate resource endpoint into the browser’s URL bar. For Device Details, the URL endpoint is:
http://192.168.1.200/api/v1/device
I was prompted to provide my Key ID and Value as a Username and Password in the browser. For Read Only access, my keyID:value, or username:password was “readonly” and “ro”. The result was:
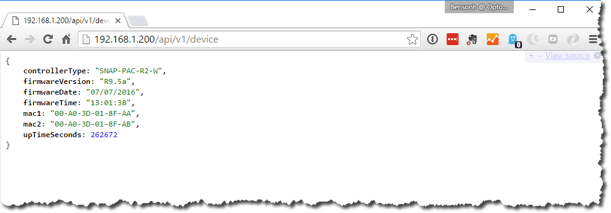
Note: The JSON returned from the SNAP PAC's RESTful server appears colorful and organized in my browser because I use a Google Chrome plug-in named JSONview. Worth getting.
Voilá! Okay, cool. But how did I know the correct endpoint URL for the Device Details? Easy. I consulted the excellent API documentation on developer.opto22.com here:
http://developer.opto22.com/static/generated/pac-rest-api/swagger-ui/index.html
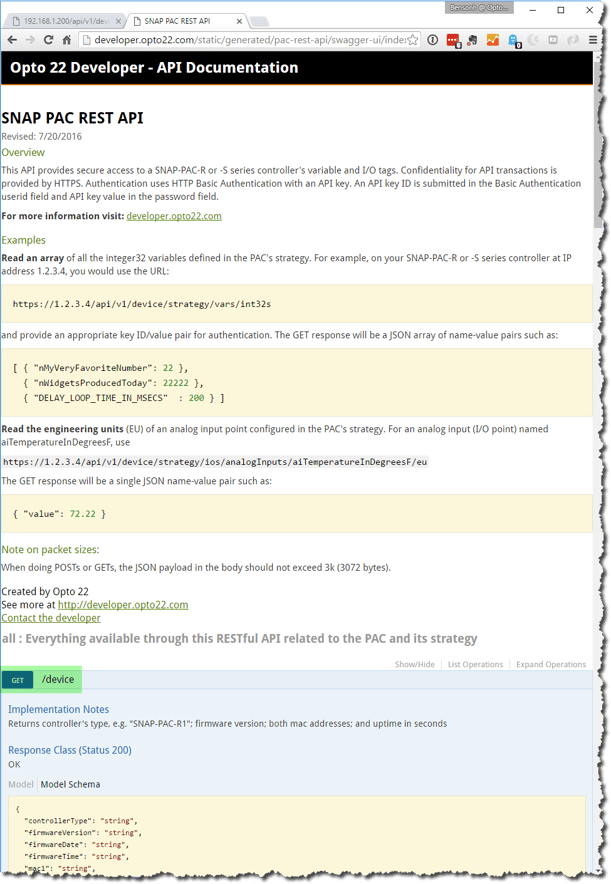
And there at the bottom of this image is the first of many supported endpoints. I can access I/O, variables, tables, system info, and strategy info.
See REST API calls now
Want to see more REST API calls in action? Here are a few links to a PAC we exposed on the Internet for demonstration purposes. You'll need the read-only credentials "ro" and "ro" for when your browser prompts you for a username and password.
RESTful API calls to http://restpac.groov.com:
Information about the PAC itself:
http://restpac.groov.com/api/v1/device
Information about the strategy running in the PAC:
http://restpac.groov.com/api/v1/device/strategy
Request all Analog Inputs:
http://restpac.groov.com/api/v1/device/strategy/ios/analogInputs
Request an Analog Output named Fuel_Display:
http://restpac.groov.com/api/v1/device/strategy/ios/analogOutputs/Fuel_Display/eu
Request all Float Tables:
http://restpac.groov.com/api/v1/device/strategy/tables/floats
Request all Int32s:
http://restpac.groov.com/api/v1/device/strategy/vars/int32s
Request 10 elements from a float table:
http://restpac.groov.com/api/v1/device/strategy/tables/floats/KPI_float_values?startIndex=15&numElements=10
Amazing.
Keep an eye on this blog. Future posts will cover adding security and demonstrating Node-RED to access my PAC data over this RESTful interface.
groov on! -Benson