Learn best practices for managing Node-RED projects on groov devices.
It’s important to be able to manage Node-RED projects for recovery, version control, copying flows to other devices, and sharing code. There are several ways to do this, but what should you be aware of and what are the best practices for doing this on a groov device?
Applying a firmware update, making major changes to a flow, and commissioning new devices can be either easy, painless experiences when done right, or very difficult if not done correctly. Understanding the tools available for backing up, saving, and sharing flows is critical in making the process as smooth as possible. In this post, we’ll dive into those tools and what they affect so you can be properly prepared.
The most important thing to note is the difference between standard nodes, configuration nodes, and their credentials, so let’s dive into that first.
- Standard nodes are really easy. They’re just what you drop into your workspace and set up to do whatever you need. Some examples are the switch, change, and HTTP request nodes.
- Configuration nodes are a bit more interesting. They don’t visually exist in your workspace and are instead referenced by other node instances.
- Finally, you have the credentials for a node, which should be kept very secure, but are also helpful when restoring a backup or reloading a previous version.
A great example of the differences can be found in the MQTT nodes. Here is an MQTT in node that brings in messages from one specific topic from the configured server. The node name, output type, message quality of service, and topic are all unique to this node, but the server is not.
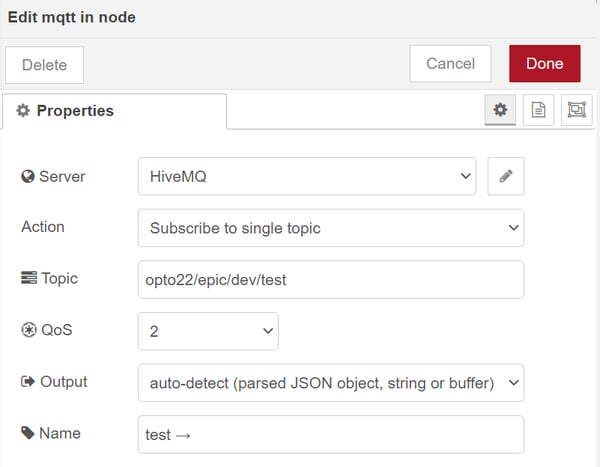
The server credentials are stored in a configuration node rather than this individual node’s settings. The big advantage to this approach is that any number of MQTT in or even out nodes can use this same server configuration, without having to reenter it every single time. You just select the server dropdown and the existing server, “HiveMQ” in this case, can be used again without any duplication of effort.
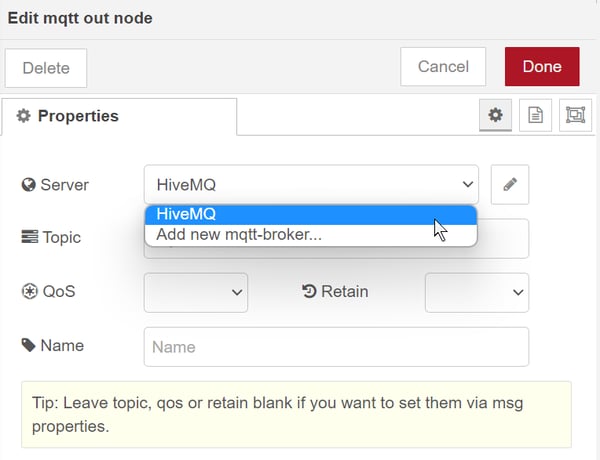
This is clearly advantageous, but where is this configuration if it’s not a node in the workspace? These nodes can exist even when they’re not being referenced. For example, you could delete all instances of your MQTT nodes and the servers you set up will still be stored, and they can be used again when you drop in new nodes. But since they are separate from standard nodes you still need a way to view, edit, and delete your configurations, and that can be found in the top-right menu under “configuration nodes.”
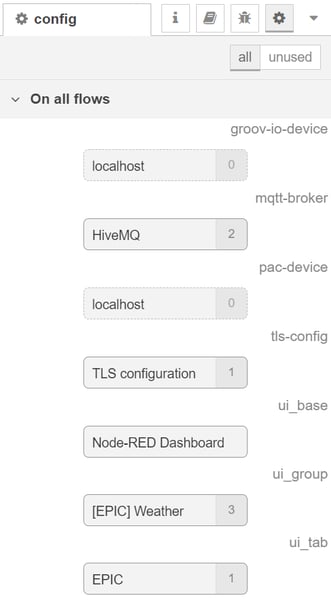
Here you can see all the configuration nodes that exist in my project, even those that aren’t actively being used. In this example, I have my MQTT broker being used in two nodes, a TLS configuration, Dashboard nodes, and two unused localhost configurations for groov-io and PAC Control nodes. By double-clicking these, you can easily bring open the shared configuration and any changes you make will be applied to all node instances that reference it. So if you have a dozen MQTT nodes all referring to the same server, it’s trivial to change the URL, user/pass, or whatever else you need without having to click into each of the individual nodes.
Speaking of user/pass, the last part to dive into is the credentials. These are especially important to be able to easily restore for yourself, but even more important to avoid sharing when giving your flow to other people or posting online. This information is held in the configuration, but is not included as part of a standard export/import. Let's take a look at the ways you can save your flows and which of this information is included or not included.
For the import/export implementation native to Node-RED you can grab individual nodes, entire tabs, or the entire project, and it will grab both the nodes in the workspace and their configurations, but not their credentials. If you copy this to your clipboard you can clearly see in plaintext what is included. For example if you are using an HTTP request node with an API key in the URL, that URL is not treated as a credential, so the API key will be completely visible in the export and can be used by anyone who gets their hands on it.
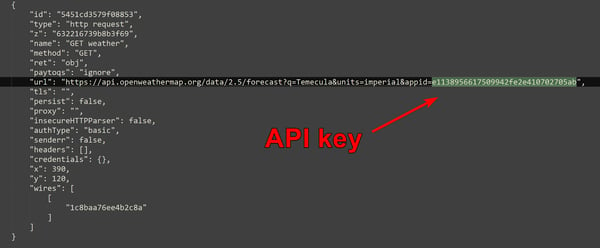
While this is very convenient when restoring your own backups or going back to a previous working version, it’s very dangerous to post this export online since it will put your key out into the wild with no encryption whatsoever. For this reason it’s important to inspect any critical flow exports before sharing them with anyone besides your own hard drive.
However, MQTT, Opto, and many other node packages do not include sensitive credential data when exporting via the Node-RED interface. For example, a hostname or IP address will be visible, but not any API keys, usernames, or passwords. This information is kept separately as a “credential” that is associated with a given configuration node ID. Here’s an example from a groov-io node.

With all that said, it’s still important to have a backup of your entire project including all configurations and credentials when making major changes, standard backups, or before updating firmware. So to get those for your groov EPIC or RIO with everything included, just go through the groov Manage Node-RED project management menu.
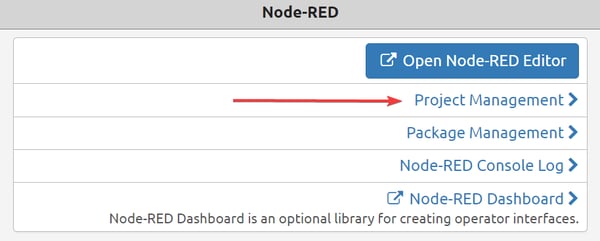
Through this menu you can view, download, and upload your entire project very easily, with the confidence that it will include all the nodes, configurations, servers, keys, usernames, and passwords that you need for the flow to work without any additional work. This is very useful and powerful, but since all of these export and backup methods are saved as plain text JSON files, it is important to be mindful of who has access to them and what is in them before you distribute them.
Another great bonus of using the groov Manage interface is that it also includes your `node_modules` folder, so any nodes you have installed can easily be carried over to new systems, even if they don’t have a gateway to the internet!
Which method you use, whether Node-RED native import/export or the groov Manage project management, will depend on your use case, but both are valuable tools once you understand what they do the same and what they do differently.
If you want to learn more about Node-RED, check out the OptoVideo channel, the Node-RED section of the OptoForums, or the official Node-RED forums.
