While groov EPIC and groov RIO products seamlessly integrate with SCADA systems like Ignition from Inductive Automation, they also have a built-in Application Programming Interface (API) you can use to access much of the information and features of the platform.
Alex Marcy, CEO of Corso Systems, explains how in this Art of the Possible guest blog.
groov REST APIs
For this post, we will focus on the groov Manage and groov View REST APIs. Specific information on everything contained within each of these APIs can be found on the Opto 22 Developer site. (This blog post will also work with the PAC Control REST API if you are using it.)
Our goal is to extract the information available from the API specification installed on your groov device, then generate a file you can import into an Ignition project and use the Ignition scripting environment to call the groov REST API directly from Ignition.
Using the groov Manage API with Ignition allows you to see what I/O modules you have installed, get information about each of the channels, and read and write to I/O and MMP (memory map) addresses. This is helpful if you are building out a tool for maintenance folks to get more detailed information about your PLC than simply I/O points, and it allows you to make everything dynamic and templatized in Ignition.
Without going into all the technical details, Opto 22 has documented these APIs using the OpenAPI Specification. This approach gives you a clearly documented way to see all of the functionality of the API using a tool called Swagger. Follow these links to see the Swagger page for the groov Manage REST API, and the groov View REST API. For this post, we will leverage the OpenAPI specification along with an open-source tool called OpenAPI Generators to generate a Python version of the API.
Normally, you would interact with the API call as seen in the Swagger documentation. Call a particular URL with an HTTP GET or POST method, pass along whatever parameters you need, and the API will return the relevant information. Using the tools in this post, we can extract the API into Python files, import them into Ignition, then use the scripting interface to call the Opto 22 groov APIs.
Securing the Premises
First, make sure you have Ignition installed on your computer and you have a groov EPIC or RIO set up to communicate with that Ignition installation. Note: If you're using Ignition running on your EPIC or RIO, these next steps are not required.
Next, you need to download the public certificate from your groov device. If you haven’t created a public certificate yet, do that first. View the instructions for creating a public certificate here. Typically this file downloads as “cert.pem”. We will use this file now and also when we are working with the Ignition installation later in this post.
If you don’t already have Java installed on your computer, do that next. We typically use the OpenJDK. Click here to download the latest version of OpenJDK from their website. Once you have Java installed, you need to run a command (with elevated privileges) in a command prompt to add the public certificate to the Java certificate keystore.
Assuming you are adding the certificate for the first time, the default password is “changeit” with no quotes.
In the command prompt, enter the command:
keytool -import -file “path-to\cert.pem” -alias opto22 -cacerts
When you're prompted for a password, use changeit if you haven’t set a password yet, then set a new strong password, and it will import the certificate.
Sharpening Your Tools
Next, you need to download the ignition-codegen tool from the Corso Systems Github repository. This page has additional detailed information on the tasks we’re describing in this post. Most notably—as of the time of this writing—you will need to install a few Python libraries to the user-lib\pylib folder in your Ignition installation folder. Specific installation instructions are contained in the ignition-codegen README file.
Finally, in the ignition-codegen README file, you will see a link to the OpenAPI Generator JAR file. Download this file as well.
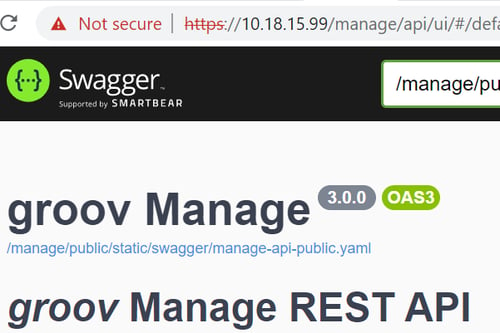
Once you have the ignition-codegen tool downloaded, you need to find the Swagger UI in your groov device. To access it, go to the groov Manage Home page > Info and Help > REST APIs. Here you will see links to the groov Manage and groov View APIs, as well as the groov Authentication Service and PAC Control from groov pages. Click the groov Manage link and watch for the Swagger page to load. Look for the link ending in .yaml right below the title on the Swagger page and click it.
We now have everything we need to generate the Ignition Python resources.
Going back to the ignition-codegen README, you will see the command we need to run. This command is slightly different on Windows vs. Mac or Linux. The following is the Windows version:
java -cp /path/to/openapi-generator-cli.jar;/path/to/ignition-codegen.jar org.openapitools.codegen.OpenAPIGenerator generate `--generator-name ignition-codegen `--input-spec /path/to/openapi.yaml `--generate-alias-as-model --output ./Opto22API
For a real-world example, this is the command we ran while writing this post:
java -cp openapi-generator-cli-7.0.0-20220526.055920-1.jar;ignition-codegen-openapi-generator-1.1.2.jar org.openapitools.codegen.OpenAPIGenerator generate --generator-name ignition-codegen --input-spec https://10.18.15.99/manage/public/static/swagger/manage-api-public.yaml --generate-alias-as-model --output C:\Users\Alex\Downloads\Opto22API
Documentation is Key
Running this command creates “docs.zip” and “project.zip” files in the directory you specified in the output parameter above.
The docs.zip file contains the Python version of the Swagger UI, giving you information (contained in Markdown files) about each of the API calls and how to use them. As an exercise for you, take these files and create a Perspective page to view them using the Markdown component.
The DefaultApi.md file is of special interest in the docs.zip. This describes all of the API calls available to you, along with example code of how to call them using Python scripting in Ignition.
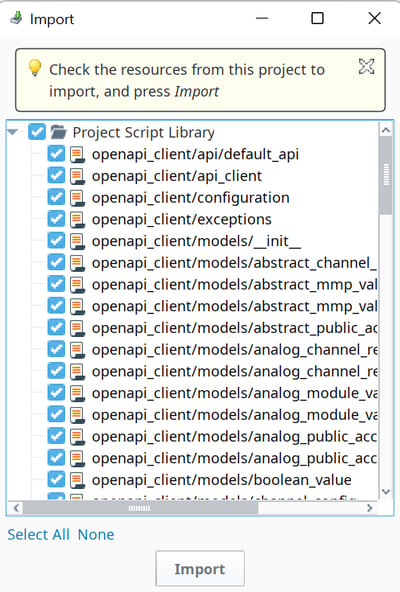
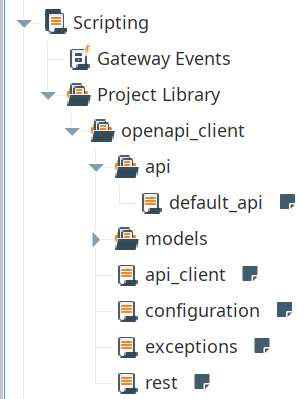
The next step is to open a Designer, and either open an existing project you want to import the Python API files into, or create a new project. In the Ignition Designer go to File > Import and import the projects.zip file, and import everything. Save your project and you are almost ready to go.
Next, you will need to generate an API Key for a user on the groov device if you haven’t already. The process to generate this API key is described on the REST API Getting Started Page. Once you have the API Key, keep it handy as you will need it to call the API from Ignition.
You also need to put the cert.pem file you downloaded earlier somewhere accessible from Ignition. To keep things simple we put it in the Ignition install directory in the data\certificates\cert.pem folder. Simply copy the file you downloaded earlier into that directory, or some other directory on the computer where Ignition is installed.
For examples of the code you will need to write, look for the DefaultApi.md file in the docs.zip file. This file describes in detail all of the API calls available, with example code you can use for accessing any of them.
I Need Those Codes
In this example, we will use the get_channel_descriptions() call. You can see the original call on this Opto 22 Developer page.

For our purposes the code from the DefaultApi.md file looks like this:
from __future__ import print_function

import time

import openapi_client

from openapi_client.rest import ApiException

from pprint import pprint

# Enter a context with an instance of the API client

with openapi_client.ApiClient(configuration) as api_client:

    # Create an instance of the API class

    api_instance = openapi_client.DefaultApi(api_client)


    try:

        api_response = api_instance.get_channel_descriptions()

        pprint(api_response)

    except ApiException as e:

        print('Exception when calling DefaultApi->get_channel_descriptions: %s\n' % e)
If you want to go into the configuration file and manually set the values there, you can use this code as is in any scripting environment in Ignition: button presses, tag event scripts, gateway event scripts, etc. Or as we show in this example, in the Script Console where we build the configuration object directly:
from __future__ import print_function

import time

import openapi_client

from openapi_client.rest import ApiException

from pprint import pprint

from openapi_client.configuration import Configuration

from openapi_client.api_client import ApiClient


configuration = Configuration(

    api_key = {'apiKey':"fLEVdxaiK3igQZEN9bgd8zq8DVVHF4Jb"},

    ssl_ca_cert="C:\Program Files\Inductive Automation\Ignition\data\certificates\cert.pem"

)

# Enter a context with an instance of the API client

with openapi_client.api_client.ApiClient(configuration) as api_client:

    # Create an instance of the API class

    api_instance = openapi_client.api.default_api.DefaultApi(api_client)

    try:

        api_response = api_instance.get_channel_descriptions()#api_instance.get_channel_descriptions()

        print(api_response)

    except ApiException as e:

        print('Exception when calling DefaultApi->get_channel_descriptions: %s\n' % e)
In the code above you can see where we set up the configuration object to store our API key from the groov Manage page, and mapped the Public Certificate file we downloaded from the groov EPIC and put it in the data\certificates folder in our Ignition install directory.
As expected from the Swagger documentation, this code returns a JSON object with the channel descriptions for all of the channels on the groov EPIC:

Wrapping Up
The groov REST APIs are powerful tools that work with any of Opto 22’s flagship products. Through the API, you can get access to information about the configuration of the device in addition to data from I/O channels—and even handle some of the basic network configuration tasks.
Combining the power of the REST API with Python scripting in Ignition is easy to do using the OpenAPI specification with the support of the OpenAPI generators.
We hope this gives you a solid foundation to build on with your Opto 22 and Ignition projects!
— Alex Marcy
CEO, Corso Systems
Alex Marcy is the founder and CEO of Corso Systems, a system integrator specializing in Ignition, Opto 22, and Manufacturing Execution Systems. He prioritizes building a diverse team prepared to solve any problem the manufacturing world can throw their way.